Operating system updates are crucial for maintaining your device's security, stability, and optimal performance. Whether you’re using Windows or macOS, these updates can fix bugs, improve functionality, and protect against security threats.
But there’s a common concern that stops many people in their tracks: “If I update or change my OS, will I lose everything?”
In most cases, updating your operating system does not delete your personal data. However, that depends on the type of update you perform, how your system is configured, and whether you’ve taken steps to prepare.
Secure Data Recovery, the trusted authority in SSD, RAID, and hard drive recovery, delivers expert solutions on the difference between OS updates and upgrades, clarifying what happens to your files during each process, and how to back up and update your system safely on both Windows and macOS.
Understanding OS Updates vs. OS Upgrades
Not all operating system changes are the same. To better understand how your data might be affected, it's essential to distinguish between operating system (OS) updates and OS upgrades.
An OS update is a routine patch or feature enhancement provided by the system manufacturer. In these cases, your files, settings, and applications remain untouched.
These updates are typically minor and focus on:
- Fixing bugs and glitches
- Improving system performance
- Addressing security vulnerabilities
An OS upgrade, on the other hand, involves moving to a new version of the operating system. This is a more substantial change and may alter the underlying architecture of your system.
Common examples include:
- Upgrading from Windows 10 to Windows 11
- Moving from macOS Ventura to macOS Sonoma
While many modern upgrades are designed to preserve your files and apps, there’s a higher risk of incompatibility, unexpected glitches, or even OS update data loss, especially if your system is outdated or heavily customised.
Here are some scenarios where data loss can occur:
- Performing a clean install or formatting your drive during the upgrade
- Upgrading from an old, unsupported OS version (e.g., Windows 7)
- Errors during the update process (such as power loss, file corruption, or drive failure)
- Inadequate free space, forcing partial installs or rollback
Note: While updates and upgrades are generally safe, they are not foolproof. That’s why creating a full backup before any significant OS change is always the smart move.
Does Updating or Changing Your OS Delete Everything?
The short answer is no. Updating or even upgrading your operating system usually does not delete your files. However, there are exceptions that every user should be aware of.
When Your Data Is Safe
In most cases, especially when applying a standard update or using a system upgrade assistant (such as Windows Update or macOS Software Update), your personal files, installed programs, and system settings remain intact. Operating system developers design these tools to ensure a seamless transition without affecting your data.
Here’s when your data is generally safe:
- You’re applying standard Windows or macOS updates
- You're upgrading to a newer OS version without choosing a clean install
- The system update or upgrade completes without interruption
When Your Data Might Be at Risk
Despite the safety of most updates, there are certain conditions where data loss is possible:
- Clean Installation. Choosing to perform a clean install (often via bootable media) erases your hard drive before installing the new OS. This will delete everything, including documents, apps, and user settings.
- Corrupt Update Process. If something goes wrong during installation, such as a sudden power outage or disk error, your system may become unstable or partially overwritten.
- Manual Partitioning Errors. Manually selecting or formatting partitions can lead to accidental deletion, especially if multiple drives or partitions are present.
- Unsupported Systems. If you're jumping from a very old OS version (like Windows 7) to the latest, compatibility issues can cause conflicts or failures during installation.
Misconceptions: Does an Update Mean a Reset?
Many users worry that "updating" will reset their system or wipe everything. This is a common misunderstanding. By default, both Microsoft and Apple updates are designed to preserve your data. However, the risk increases the more manual control you take, especially when using advanced install methods or working with unsupported hardware.
Step-by-Step: How to Back Up on Windows and macOS
Before updating your OS, follow these steps to ensure your data is backed up safely. Whether you're using Windows or macOS, there are built-in tools that make the process simple and effective.
How to Back Up on Windows
1. Back Up Files Using File History
File History automatically saves versions of your personal files so you can restore them later.
Here are the steps on Windows 11:
- Connect an external hard drive or USB drive.
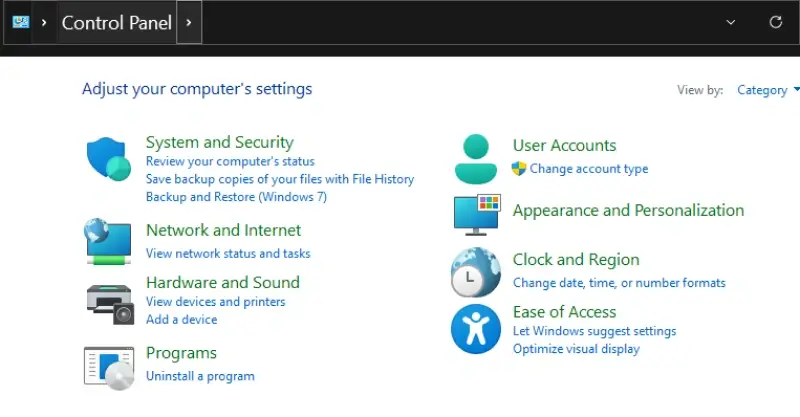
- Open Control Panel.
- Click Save backup copies of your files with File History.

- Click Select drive in the left panel.
- Choose the right volume.

- Click Run now.
- Select Advanced Settings to set the backup frequency and duration.
2. Create a Full System Image
A system image is a complete snapshot of your OS, files, and software – perfect for restoring everything in case of a failure.
Steps:
- Launch Control Panel.
- Select Backup and Restore.
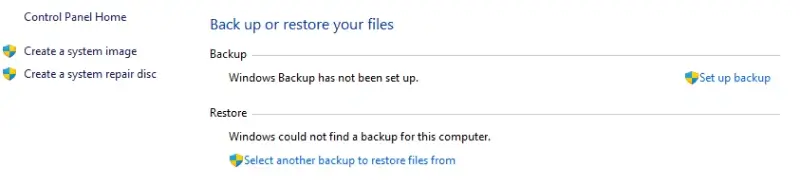
- Click Create a system image on the left panel.
- Choose a destination: external drive, DVD, or network location.
- Follow the prompts to start the backup.
Tip: If you’re upgrading your OS, a full system image lets you roll back your entire system if something goes wrong.
3. Use OneDrive for Cloud Backup
If you use Microsoft 365, OneDrive can sync your Desktop, Documents, and Pictures folders automatically.
Steps:
- Right-click the OneDrive icon in the taskbar.
- Select Settings, navigate to Backup, and select Manage Backup.
- Enable folder backup and let it sync your files to the cloud.
How to Back Up on macOS
1. Use Time Machine for Automatic Backups
Time Machine is Apple’s built-in backup tool, offering versioned snapshots of your entire system.
Steps:
- Connect an external drive formatted for macOS (APFS or Mac OS Extended).
- Go to System Settings, then General, and select Time Machine (or System Preferences in older macOS versions).
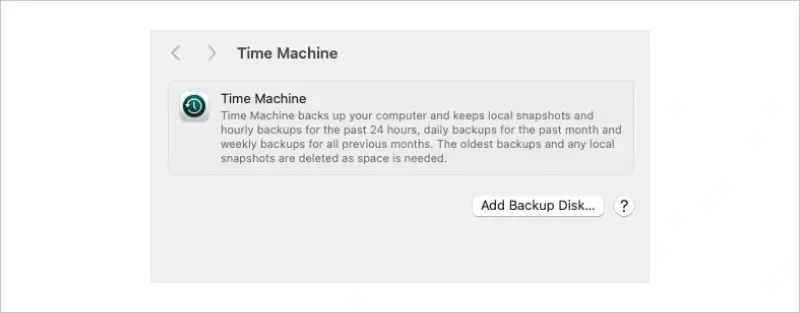
- Click Add Backup Disk, choose your drive, and confirm.
- Time Machine will begin automatic hourly backups.
- You can restore individual files or your entire Mac later if needed.
2. Backup Files with iCloud Drive
For file-level backup, iCloud lets you sync your most important folders and documents.
Steps:
- Go to System Settings, select Apple ID, then iCloud.
- Enable iCloud Drive, then click Options.
- Select folders like Desktop and Documents.
- Files will now sync securely to your iCloud account.
Note: Always ensure your external drive has enough space to complete the backup and that it's not interrupted during the process.
How to Update Your Operating System Safely
Once your data is backed up, you're ready to update your operating system. Whether you're installing routine patches or performing a significant upgrade, following the proper steps ensures a smooth transition.
Updating Windows
1. Standard Windows Update
This is the easiest and safest way to keep your system up to date.
Steps:
- Open Settings.
- Select Windows Update from the left sidebar.
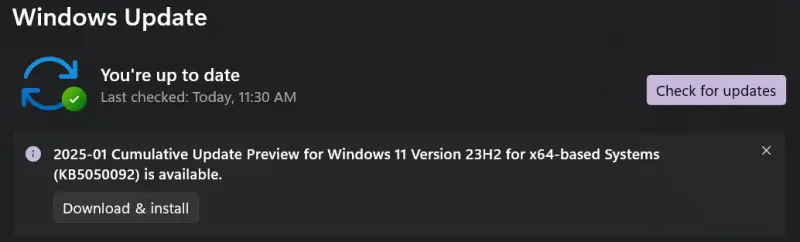
- Click Check for updates.
- If updates are available, click Download and Install.
- Follow on-screen instructions and restart your PC when prompted.
Windows will preserve your personal files and apps during standard updates.
2. Upgrade to Windows 11 Using the Installation Assistant
Use this method if you’re upgrading from Windows 10 to Windows 11.
Steps:
- Visit Microsoft’s official Windows 11 download page.
- Download the Windows 11 Installation Assistant.
- Launch the tool and follow the guided steps.
- Ensure your system meets Windows 11 requirements.
Tip: Choose the Keep personal files and apps option when prompted, but be sure to backup in case the migration fails.
3. Clean Install (Caution: Advanced Users Only)
This process will delete everything on your main drive.
When to use:
- System is unstable
- You want a fresh start
- You’re replacing the hard drive
Steps:
- Create a bootable USB with the Windows Media Creation Tool.
- Boot from the USB drive.
- Choose Custom: Install Windows only (advanced).
- Format the primary partition.
- Proceed with installation.
Note: All files will be lost unless backed up in advance.
Updating macOS
1. Standard macOS Update
Apple’s built-in update tool preserves your files and settings.
Steps:
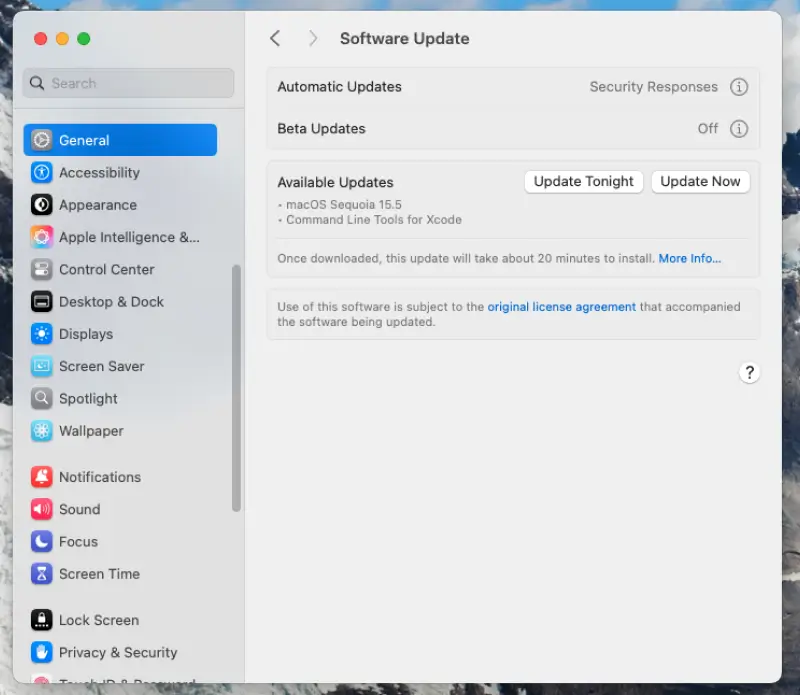
- Open System Settings, navigate to General, select Software Update (or System Preferences in earlier versions).
- Your Mac will check for available updates.
- If an update is available, click Update Now or Upgrade Now.
- The system will automatically download and install the update.
- Restart your Mac after installation to complete the process.
2. Upgrade macOS via the App Store
For major OS upgrades (e.g., from Ventura to Sonoma):
Steps:
- Open the App Store on your Mac.
- Search for the latest version of macOS (e.g., macOS Sonoma).
- Click Download and follow the installation prompts.
- Your files and applications will remain intact by default.
3. Clean Install macOS (Optional)
A clean install wipes your entire system.
Steps:
- Download the macOS installer from the App Store.
- Create a bootable USB installer using Terminal.
- Boot from the USB drive by holding Option at startup.
- Use Disk Utility to erase the disk.
- Install macOS on the clean drive.
Note: Only perform this if you’ve fully backed up and want a fresh setup.
Post-Update Checklist
After updating or upgrading your operating system, it’s important to verify that your files, settings, and apps are intact. This post-update checklist helps you confirm that everything is working correctly and what to do if something isn’t.
1. Confirm Your Files Are Safe:
- Open key folders like Documents, Pictures, Desktop, and Downloads.
- Check external drives or cloud storage if you used them for backup.
- Open a few files to verify that they open properly and haven’t been corrupted.
If anything is missing, don’t panic. You may be able to recover deleted files using your backup or professional recovery services.
2. Check Your Applications:
- Launch your most frequently used programs.
- Make sure they function as expected and haven’t lost data.
- Reinstall any apps that were removed during a clean install, or if compatibility issues arise.
3. Test System Settings:
- Review your network connections, display preferences, and privacy settings.
- Reconnect to Wi-Fi networks if necessary.
- Re-enable Bluetooth or peripheral device connections (printers, monitors, etc.).
4. Run Windows or macOS Troubleshooter (if needed):
If you notice any unusual behaviour after the update, like slow boot times, errors, or crashes, use the system’s built-in diagnostic tools:
- On Windows: Go to Settings, navigate to System, then select Troubleshoot.
- On macOS: Restart into Safe Mode (hold Shift during boot), then check Disk Utility, then select First Aid.
5. Delete Temporary Files
System upgrades often leave behind old installation files, which can take up unnecessary space.
- On Windows: Run Disk Cleanup or Storage Sense to remove “Previous Windows installations.”
- On macOS: Use About This Mac, select Storage, then navigate to Manage to free up unused system files.
Tip: Keep your external backup until you’ve verified everything works for at least one week.
Conclusion: Update With Confidence – But Always Prepared and Trust the Experts
Updating your operating system is essential for security, performance, and software compatibility, and while your data is usually safe, it’s vital to back everything up first. Both Windows and macOS provide built-in tools, and cloud storage offers added protection. Still, no system is foolproof. Data loss can occur during failed installations, clean installs without a verified backup, or unexpected hardware issues. If that happens, avoid DIY recovery attempts, as they can exacerbate the situation.
Secure Data Recovery offers specialised, comprehensive solutions tailored precisely to your needs. Our team ensures a seamless and convenient recovery process for a hassle-free, high-performance data security solution.
Contact us today at 800-705-3701 to speak with our specialists and begin the secure recovery of your data.